
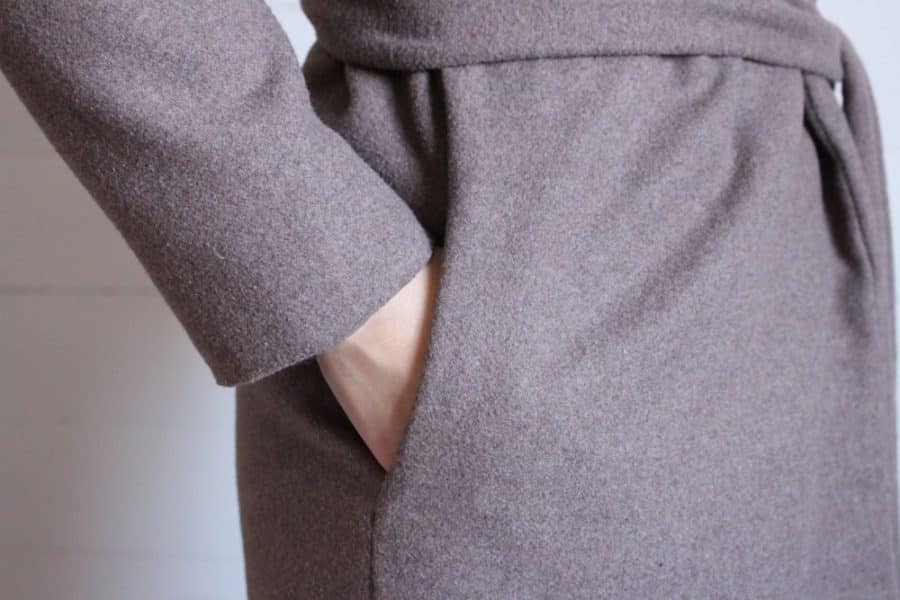
In this tutorial, we'll show you how to add pockets to the Olga coat. To preserve the coat's beautiful, clean lines, we'll add the pockets along the side seam.
1) Create the pattern for the pocket backs
On a sheet of A4 paper, sketch the pocket lining freehand. Be sure to leave enough space to slip your hand inside.
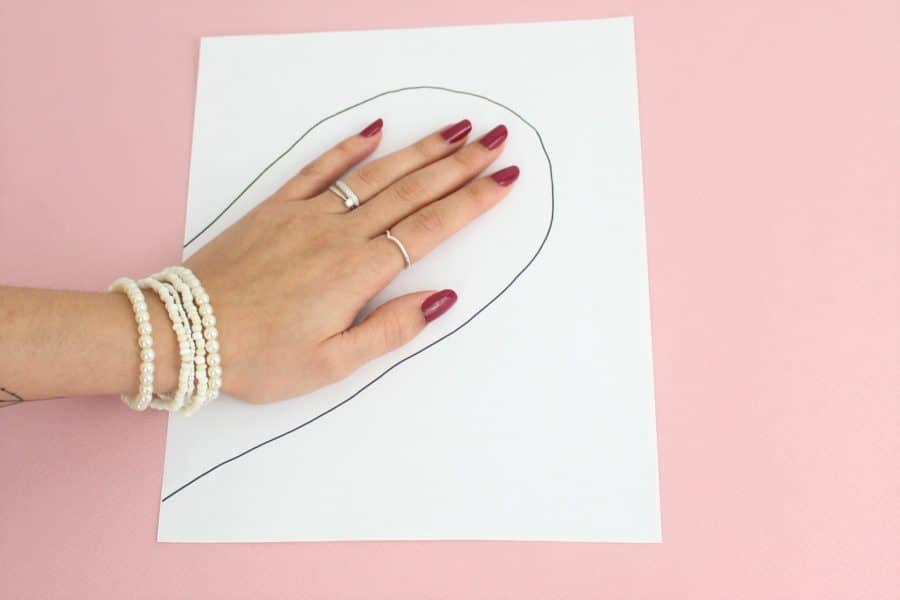
Next, we'll draw the 1-cm seam allowance in red.
We'll also mark a notch at the top of the pocket. This will be the pocket notch.
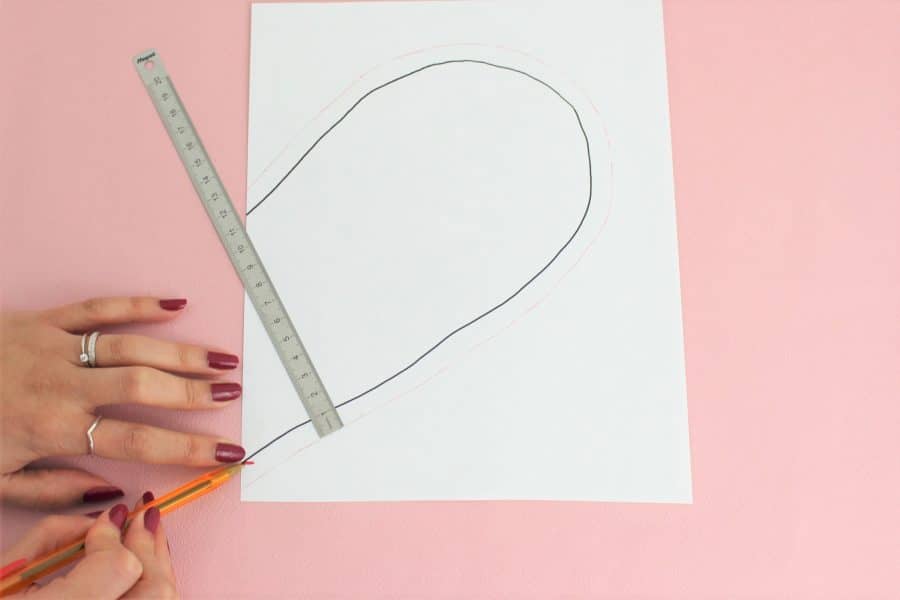
Finally, cut out your pattern. You'll then need to cut out 4 pocket bottoms from the fabric of your choice.
Note: The pocket backs come in pairs. To avoid confusion, we recommend folding your fabric right sides together, pinning the pattern in place, and cutting it out. You’ll then have 2 pocket backs.
Repeat this step to make 4 in total.

2) Sew the pockets
First, we'll distinguish between the case where the coat isn't sewn yet and the case where the coat is already sewn, but you want to add pockets to it.
Case #1: The coat is not sewn.
On the patterns for pieces No. 1 and 2 (the front and back), measure 10 cm below the waist notch and mark a notch. This will be the pocket notch.
Follow the instructions in your sewing booklet up to and including Step 2.
Before moving on to Step 3 in the sewing booklet, we’ll sew the pockets. To do this:
- Pin the pocket backs to each front piece, right sides together, aligning the pocket notches with each other.
- Sew 0.8 cm from the edge, starting the seam at the very top of the pocket and ending it at the very bottom.
- Iron while folding the seam allowance toward the pocket.
- Then do the same with your back.
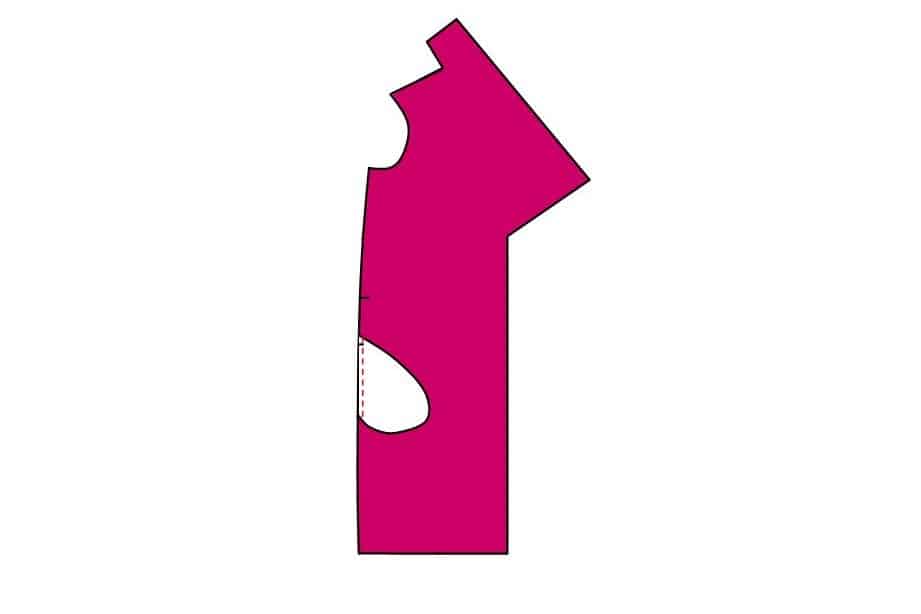
Next, refer back to the sewing booklet to complete steps 3 and 4.
For step 5, we’ll make a slight modification.
We’ll pin the front and back pieces right sides together, making sure the pocket bottoms are facing out. Then we’ll sew as shown in the diagram, 1 cm from the edge.
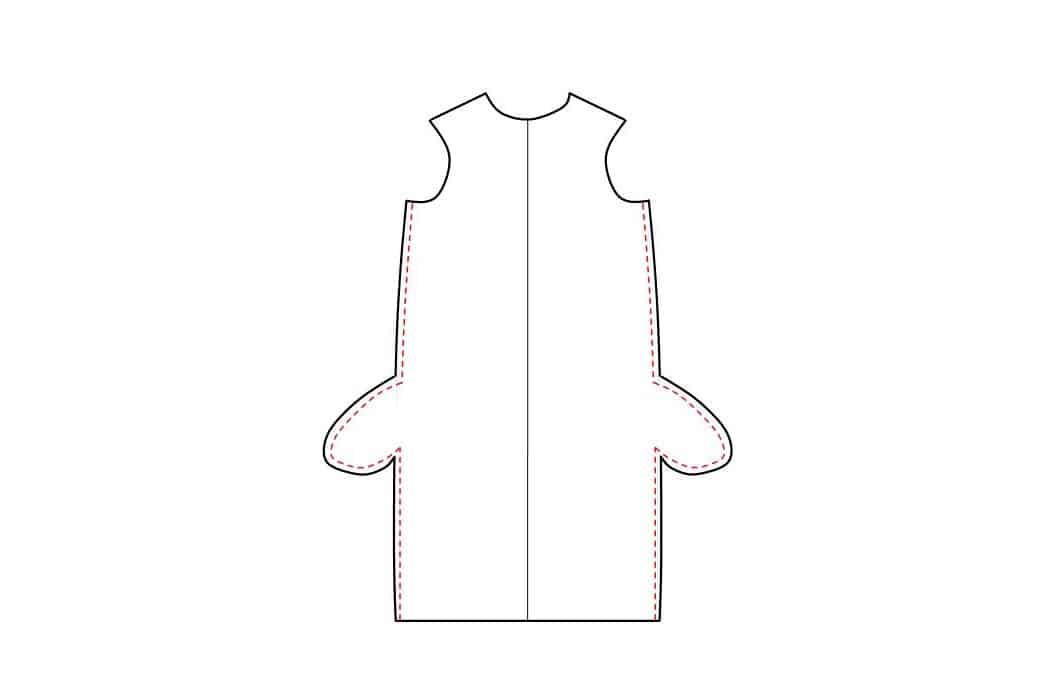
Then press the garment again, opening the seam with an iron along the sides.
From here on out, nothing changes—you can just follow the sewing instructions all the way through!
Case #2: The coat is already sewn
Unpick the lining sleeve (which you sewed shut in the very last step of sewing the coat) and turn the coat inside out.
Locate the size mark at the side seams. Measure 10 cm down from there and mark the spot with chalk. This will be your pocket mark.
Next, unpick the side seam for about 30 cm. This will allow you to follow the tutorial above to sew the pocket bottoms.
Finally, once the pocket linings are sewn in place and the sides are sewn shut, you can turn the coat right side out through the hole in the sleeve lining and close that hole.
And there you have it—your coat has cute side pockets!