
Here, we'll learn how to shorten a pattern. If you need it, we've also created a tutorial on how to lengthen a pattern.
At Majam, our patterns are designed for a height of 1.68 m. So if you're much taller—or much shorter—you'll need to adjust your pattern slightly.
The general rule
If you're a little shorter than 1.68 m, there's no need to make these alterations.
However, if you're 1.60 m tall, for example, you'll want to shorten the pattern. For this tutorial, we'll use 1.60 m as an example.
It is generally accepted that the difference is evenly distributed between the upper and lower body. We can therefore say that the pattern is 4 cm too long in the upper body and 4 cm too long in the lower body.
But it’s important to know that when you’re shorter, you’re shorter all over—from your forehead to your ankles. So if you’re 1.60 m tall, you shouldn’t subtract 8 cm from the pattern!
It’s generally accepted that you should subtract 1 cm for every 2 cm difference.
In our example, we’ll subtract 2 cm from the upper body and 2 cm from the lower body.
This is a rule of thumb: if your bust is larger than your legs, then adjust the fit by taking in 3 cm at the bust and 1 cm at the bottom, and so on.
How to Shorten a Pattern
The basic technique is always the same. It works almost every time.
If you feel lost while following the instructions, it means the pattern has a specific feature—so don't hesitate to look up the tutorial for your pattern.
Step 1: Locate the “Lengthen/Shorten” line on the pattern and cut along it
All of our patterns have a double "lengthen/shorten" line to help you know where to make adjustments without throwing the pattern off balance.

Start by locating this line, then cut out the pattern along one of the double lines (here, we’ve chosen to always cut along the top line, but it doesn’t really matter which one you use).

Step 2: Draw a line on the bottom piece
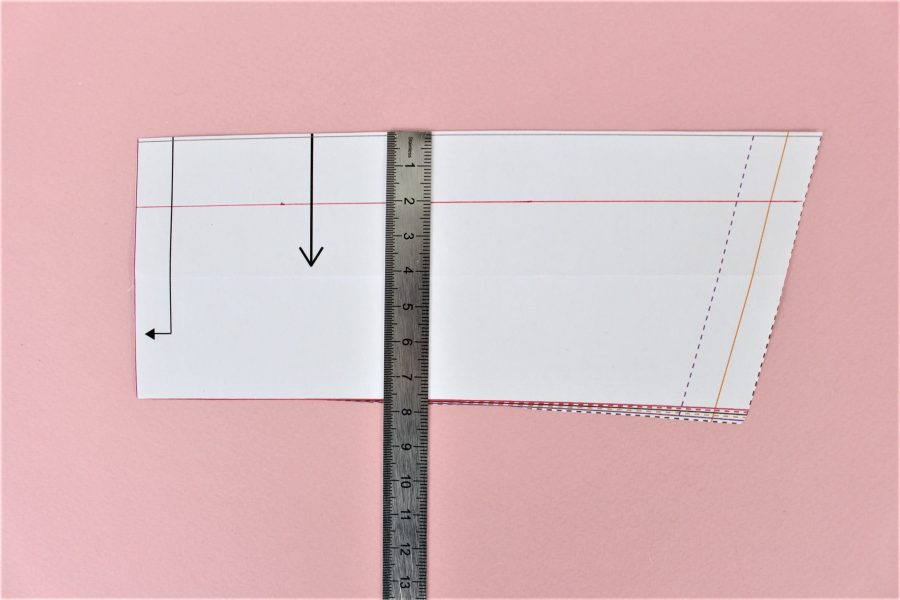
On the bottom piece, measure x cm to be shortened and draw a line. In our example, measure 2 cm and draw a line.

Step 3: Restore the straight line
Align the top piece with the line you just drew, making sure to keep the grain arrow perfectly straight. This is extremely important—the grain must always be aligned correctly.

Use tape to hold the pieces together.
You'll notice at this point that the side is misaligned—that's normal.
Step 4: Redraw the side lines
Using a ruler or freehand, depending on the shape of the pattern, redraw the side seam line.

Step 5: Cut along the new lines
All that's left to do is cut out the pattern along the new lines you've drawn.
For a neater result, you can trace the entire piece onto pattern paper if you'd like.

Which parts need to be shortened?
If you decide to shorten a pattern, you must shorten all the pieces affected by the shortening. At Majam, all of these pieces include “lengthen/shorten” lines.
This generally includes the front, the back, certain facings, and sometimes pieces specific to the pattern in question.
And if you'd like to learn even more about pattern alterations, check out the Majam Academy course, "Pattern Alterations: The Essentials"